Showing posts with label vegan. Show all posts

9.30.2009

Feelin' crunchy


This weekend was our first taste of autumn. We went for a run in the woods looking for five features of fall (and yes, in April we sought seven signs of spring because we are alliteration nerds). My favorites: squirrels gathering nuts, a Japanese maple in brilliant display, and the cool breeze by the water. It was all I needed to turn on the oven and get some cinnamon baking. Inspired by my new find, gluten free oats (!), I decided to try my hand at granola.
This one is peanut-buttery and perfect for studying. I'm a crunchy snacker when I have papers to write, so this treat was gone a little too fast :) I hope you enjoy!

Study Break Granola
1. Preheat oven to 275

2. Toast on a baking sheet for 5-10 minutes, careful not to burn:
1/4 c each: sunflower seeds, chopped walnuts, and almonds

3. Melt together over low heat in a small saucepan:
1/4 c. crunchy peanut butter
1/4 c. honey
2 1/2 T canola oil
1 tsp. vanilla extract

4. In a large bowl, combine toasted nuts and seeds with:
1 1/4 c. GF oats
1/4 c coconut flakes
1/4 c ground flax seeds
1 tsp. cinnamon
1/2 tsp. pumpkin pie spice

5. Add wet to dry and combine well.

6. Spread onto jelly roll pan and bake about 30 minutes, turning every 10-15 minutes to prevent burning.
7. Remove from oven when golden and toasty and let cool at least 20 minutes while it firms up.

Happy munching

5.30.2009

Fun in the sun- grilling "in"

Sorry I have been MIA the past few weeks. I have been cooking and eating delightful, fresh-off-the-farm produce and savoring every bite (privately), but I guess it's time I got back to sharing my goodies.

Last weekend was a perfect preview to summer: sunshine, bar-b-que, sales! We took advantage of the incredible long weekend and broke out the (stovetop) grill, joining the millions of families who charred up their Memorial Day. Saturday night, after a mega-Coop shopping trip, we created incredible sandwiches with all the flavors of the season: fresh pesto, heirloom tomatoes, grilled onions and portabellas.

I marinated the mushroom caps for about an hour in a simple dressing of balsamic vinegar, olive oil, garlic, salt and pepper. I then grilled them alongside slices of sweet vidalia onion and brushed them with the remaining marinade, as needed, for about 20 minutes (flipping and rotating for that perfect grilled "x").


The pesto is a new creation each time, but roughly followed the recipe I posted last year: just a bunch of fresh basil, half a lemon, a couple ounces of parmesan, and a handful of nuts (EVOO, sale, pepper, of course). We spread the pesto on both slices of toasted (millet) bread, then layered the mushrooms, grilled onions, drunken goat cheese (one of my favorites), and lettuce and tomato. It was scrumptious!


Afterwards, we went out for a much-deserved scoop of "Louie G's" ice cream from our local shop. Waiting in line outside the blue and white striped awning with all the adults and kids brings huge summer flashbacks of dashing to get a cone after a day of swimming at the pool or running around at summer camp. This ice cream was just as delicious, and deserved. Alex models mint chip on a green T-shirt:


More from our "grill" soon: pancakes that almost made me weep for joy (I'll explain...) Also, we're expecting a whole lot more summer afternoons at the pool when we make the big move southward.
Hope you're outside enjoying the birdsongs and BBQ smells. Isn't this season amazing?!

5.05.2009

Wild rice sald

It's been raining almost non-stop for what feels like weeks. The trees have burst into green and the grass is deliciously lush, but the humans aren't feeling so happy. Even the dogs at the park are glum.

To shake us out of some London-esque spring blues, I concocted a hearty and savory wild rice salad this weekend. It was one of those recipes I wake up with, as my final dream of the morning, giving subconscious direction to my culinary moves for the day. The same thing happened earlier this spring when I awoke with the NEED for a watercress and radish salad. I've never eaten watercress and I don't care for radishes, but on that morning, I knew it was the right thing.

So this wild rice salad of my dreams exceeded my expectations and warmed our house with its simmering scents. And now it's filling our bellies at our cold drowsy offices as we wait for the sun to shine through. It only gets better as it soaks up the juices.
This is a version I made with strawberries and peaches, which are perfect with the toasted pecans.

Wild rice salad of my dreams (all measurements are approximate, use your judgment)

In a medium sauce pot, combine and simmer 45 minutes:
1 c. wild rice (rinsed)
1 c. long grain brown rice
4-5 c. water (I can never get the amount just right)
1/2 stick cinnamon
2 bay leaves
1 star anise
3 cloves
1/2 tsp. peppercorns
1/4 tsp. allspice balls

When it's cooked, remove all the spices and leaves and let sit for a few minutes with the lid on. Then fluff and let cool while you prepare the mix-ins:

1 carrot, peeled and sliced to thin medallions
Zest of an orange
Juice of 1/2 an orange (more to taste, as needed)
EVOO (as needed)
1 bunch scallions, minced
2 Tbsp. cilantro, chopped
1/2 red onion, diced
1/2 c. pecans, chopped (throw in more, to taste)
Salt and pepper to taste

Toss all parts together, adding other veggies, cheeses (feta and goat are both good options) or dressing components and let sit as long as you're willing. The spices add a subtle aroma that melds really well with the orange juice and the hearty crunch of the wild rice.

What recipes have you dreamed of lately?

2.27.2009

Warmth from winter veggies

After my "Week of Soups" in the middle of February, I had to concoct a new way to stay cozy and well-fed in the dregs of winter. For me, it's the bright, bitter-sweet taste of rainbow chard, layered with a savory bit of protein. Last night, I came up with a combination that really zaps my winter blues away and warms my heart. The colors, textures, and subtle flavors of each component meld so well, it's definitely a beautiful and satisfying medley of winter veggies.

1. First, I roasted a delicata squash (beautiful yellow oblong squash about 5" long with green veins running down like a pumpkin) with some olive oil in a covered pan for 30 minutes at 350 degrees. Just halve the squash lengthwise and scoop out the seeds before roasting face down on the pan.

2. I sauteed a bunch of rainbow chard (a bundle containing white, pink, and golden-stemmed varieties) with a load of onions, garlic, and a healthy grind of fresh black pepper. This is seasoning enough for the gorgeous greens.

3. I shoved the greens to one side of the pan when they needed to simmer more and sprayed some EVOO and Bragg's liquid amino acids on the spot for some thinly sliced (1/4") tofu. This seared the skin, browned it nicely, and when I turned the slices, I added a fine layer of dijon mustard to give a kick to the protein and imitate fish.

I just put half a squash on my plate, loaded it with greens, and lay the tofu on top. I wish I had a picture of the pink, green, and golden dish, but I ate it all before I thought to snap a shot. Alex was reading an article in Cooking Light about the benefits of fish (and we were having a debate about the ethics of eating fish) when I took my first bite. It was so reminiscent of fish, I immediately served him a layered forkful, and he remarked that he would have believed it was fish. So, for fish lovers out there, this is a decent substitute as well.

It's so simple and delicious for a weeknight, helps me recharge for the next day. And I made leftovers for lunch!

2.16.2009

A Homemade Valentine's Day

Last year, Alex and I were in Paris for Valentine’s Day, strolling arm in arm through Montmartre as we lunched on crepes and pan au chocolat. This year, having already gone on our annual adventure (to the Caribbean!), we knew it would be low-key. However, despite my plans to do nothing, Alex insisted we make each other a gourmet meal, and that was hard to turn down. In a nice role reversal (that turned into some baking catastrophes for me), Alex took on dinner and I took on dessert.

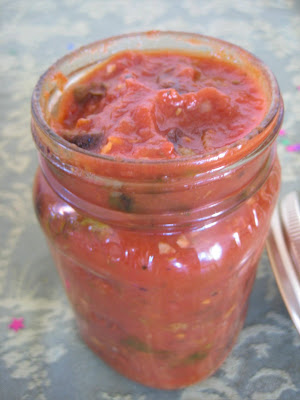
Craving something spicy, romantic, and succulent, we selected a puttanesca sauce based on a Jamie Oliver recipe, ripe with crushed red chilies, fresh olives, and tart capers. We simply made both normal and gluten-free pasta so we could both enjoy the main dish (and doubled the recipe for plenty of leftovers--note the reused mason jar of deliciousness below).

Puttanesca Sauce (minus the anchovies)
EVOO to coat the pan
2 cloves of garlic
2 handfuls black and/or kalamata olives, pitted and halved
½ a jar of capers, drained
2 dried chili peppers, crushed
½ tsp. dried oregano
1 (28 oz.) can of diced tomatoes
Salt and pepper, to taste
Large handful of fresh basil leaves, torn
Drizzle of EVOO to top off each portion

Heat the EVOO in a large saucepan, then saute the garlic through oregano for a few minutes. Add the tomatoes and simmer for 10 minutes. Turn off the heat and toss in the basil, stir and drizzle with olive oil. The salty, sexy olives just burst in your mouth, and the spicy tomato base makes this a delicious romantic meal. The handfuls of freshly torn basil leaves tossed in at the end bring a light finishing flavor to the rich sauce (which we quickly cleaned from our plates). A simple spinach and goat cheese salad balanced our meal and prepped us for the richness of dessert.
In keeping with the rustic Italian theme, I found a recipe from the Ottolenghi cookbook(in Gourmet Magazine) for an orange polenta cake that uses almonds and polenta as the main flours. With a minor substitution of ½ GF flour for all-purpose wheat flour, I easily adapted it to be gluten free and just as delicious. The rustic quality of the flours and polenta combined with the heady flavors of orange and almond make it a perfect mid-winter treat.

The cake is layered with first a rich caramel, then juicy slices of navel oranges, then the batter (it comes out like an upside-down cake). Once it is cooked and inverted, you drizzle a marmalade glaze over the top which seeps in, infusing every bite with a moist orange flavor. To top it off, Alex made fresh whipped cream with orange extract, and we served a bit of glaze on the plates. It was phenomenal, if a bit of a sugar overload. This morning, we had slices for breakfast, and it was a perfect scone-like delicacy. Definitely a make-again, especially for brunch or an elegant tea time (which I've never had, but which I'm sure some people put on).

Orange Polenta Cake
Preheat the oven to 350 degrees. Grease a 9” cake pan and line it with parchment paper.

For the caramel layer, simmer together in a small saucepan:
½ cup superfine sugar (process granulated sugar for a minute or so)
2 Tbsp. water
2 Tbsp. unsalted butter, cut to bits
2 oranges, zest reserved for cake batter, sliced horizontally (peel and pith cut off)

Simmer the sugar and water together over med-hi heat, swirling and washing down any sugar crystals that form on the sides with a pastry brush dipped in water. It will take a few minutes before the sugar dissolves and the mixture colors amber, but watch it carefully (my first batch burned and I had to start all over, what a waste!) When the mixture turns to caramel, remove from the heat and add the butter and swirl to combine.

Quickly and carefully pour into the prepared pan and tilt to coat the bottom. Spread orange slices in concentric circles across the caramel layer. This will be the top of the cake, so arrange them carefully for a nice design.

For the cake:
1 ¾ sticks butter, softened
1 cup superfine sugar
3 eggs
zest of both oranges
1 tsp. orange extract (or 2 tsp. orange flower water)
½ cup all purpose (GF) flour
1 tsp. baking powder
½ tsp. salt.
2 cups of ground almonds (I put raw almonds in the food processor so they were still a bit coarse, which worked well with the texture of the polenta)
2/3 cup quick-cooking polenta

Cream together the butter and sugar in a large bowl until combined. Add the eggs, one at a time, until well mixed. Add the orange zest and the orange extract. Whisk together in a dry bowl the flour, baking powder, and salt. At a low speed, add the dry ingredients into the butter/sugar mixture. Blend in the ground almonds and the polenta to just combine.

Spread batter evenly over the orange slices in the cake pan and bake until a knife inserted in the middle comes out clean and the top is golden, 1- 1¼ hours. Let cool 5 minutes and then invert onto a cake plate. Serve warm or at room temperature.

For the glaze, melt in a small saucepan:
¼ cup orange marmalade
2 Tbsp. water.
Drizzle a bit over the top and sides of the cake. It’s pretty sweet, so go easy if you don’t want a very sugary dessert. You could also cut back on the sugar in the cake, if needed. A tart marmalade would work really well too.

For the orange whipped cream, mix on hi:
Whipping cream, powdered sugar, and orange extract, to taste.

It was a perfect, if gluttonous Valentine's Day, enhanced by the joy of selecting and preparing our meal together, and savoring each bite without the hectic or hurried atmosphere of a NYC restaurant. Although I believe it's silly for Americans to focus on only one day each year to be romantic, I did enjoy our celebration and look forward to many other weekend nights where we can take time out to share our joys (and food).

(Beneath the Arc du Triomphe 2/14/08)

2.07.2009

Making the most of tofu

I get stir crazy in the winter. November and December are okay because I can focus on holiday decorating and feasting, but January is just cold. This year, we went to Cinnamon Bay, returning just in time for February, my favorite month. It's bookended with Alex's and my birthdays, nestling Valentine's Day in the middle. But that said, sometimes I have to spice up the cold, seemingly endless winter days to make it to February, and then to see myself through to the first crocuses in March.
So I made ground "beef" tacos.

Which I turned into scrambled tofu two days later.
And led to the perfect holed-up-in-the-cold game, Scrabble. Check out my hand!
Ground "Beef" Tacos with Guacamole
1 block of medium-firm tofu, drained
3 gloves garlic, as you like it, minced
Tsp or so of each: cumin (for a meaty flavor), turmeric (for the color), curry powder (for spice), cayenne pepper (for fire), and hot sauce or red pepper flakes (if it ain't hot enough)
Soy sauce or Bragg's liquid amino acids

1. Heat a large skillet on med-hi and add the tofu (no oil needed, I found). Spritz the tofu with the Bragg's or soy sauce and mash it with a potato masher. This gives it the crumbled texture of ground meat and works much faster than a fork.

2. Add the spices and garlic, to your taste, and just mash them all together until you like the flavors. More soy sauce may be needed to moisten the tofu and deepen the color.

3. Pile onto a hard corn tortilla with salsa, cheese, and homemade guacamole.

Never-fail Guacamole
The amounts of each ingredient may vary, depending on the size and flavor of your avocado, but these are my approximate ratios. I am a guac purist, so I only add these four ingredients, although you can try adding onions, cilantro, salsa, smoked paprika, etc for a different effect.

1 Haas avocado, ripened (indents when you press the skin)
2 cloves of garlic, minced
1/2 a fresh lime, juiced over the avocado
Salt to taste

I just halve the avocado and score it so it's already broken up when I scoop it into the mixing bowl. Then I add the lime to keep it from turning brown (the acidity blocks the oxidization), and then toss in the garlic. After mixing this up, taste to see if you need more lime juice or garlic, and then add the salt. Every drop of this that I have ever made was consumed within one sitting, hence the name.

Scrambled Tofu
To convert my ground "beef" leftovers for a brunch-ready meal, I just tweaked a few things and got rave reviews from the coffee table.

Mashed, seasoned tofu (see above)
1 yellow onion, diced
Leftover roasted potatoes (I just sliced them up for rustic homefries)
Turmeric

Saute onions in EVOO. Add the potatoes and tofu. Season as desired and serve piping hot.

Happy February!

8.20.2008

Popcorn: the best snack (or meal!)

What is more tempting than the warm, nutty aroma of a freshly popped pot of popcorn? Nothing, so don't try. Well, maybe the smell of coffee beans roasting, but that's about it. Popcorn has an inviting, "it's raining outside so let's hunker down with a movie" air to it which makes the textural, flavorful indulgence all the more special and delicious.


I've been perfecting various flavor combinations for assorted movie purposes (kettle corn for a kids' movie, curry spices for an Indian flick), and have come up with a new balance that just sends me smiling to the corner of the couch where it's hard for anyone else to get their hands in my bowl. When I'm making a really delicious air-popped feast, I tend to serve my partner in another bowl so that I can savor my own without the fear of running out. I am not a handful-at-a-time eater, I much prefer the single kernel method. To Alex, popcorn is a snack, an afterthought while the main entertainment happens on-screen. To me, popcorn can be an all-consuming task, a meal extravaganza, hence the title of this post.


A note on pot-popping: This is a great method because all you need is a large pot with a lid (mine is clear glass, which is perfect for watching the kernels explode) and you can reduce the fat by popping in olive oil, which coats the popcorn, rather than pouring melted butter on top. To start, pour enough oil to coat the bottom of the pot and add kernels to coat in a single layer; my pot holds 1/4 cup. Turn the heat to Med-Hi and wait as it sizzles. When the popping starts, be sure it's not too hot (smoke coming out) or too cool (slow, spaced-out pops) and shake the pot occasionally to stir up any lost kernels. When it slows to 2-3 pops per second, turn off the heat, give it one last shake, and lift the steamy lid for popcorn perfection. Toss with your favorite spice combination and consume immediately.

My latest popcorn sensation:

Jumping Kernel Corn
Makes one large bowl of delectable crunch for studying or curling up with a movie

Pop together on Med-Hi heat:
2 T olive oil to coat pan
1/4 cup popping corn kernels

Toss kernels with:

1-2 tsp. Bragg Liquid Amino Acids (my sister introduced me to this, it's a miracle GF topper and it tastes like soy sauce)
2 T nutritional yeast (rounds out the meaty flavor and adds the definitive yellow tinge as well as a spectrum of B vitamins we veggies crave)
1/2 tsp cayenne pepper (if you like it spicy)
1/2 tsp. smoked paprika (my new favorite seasoning)
2 tsp curry powder

Spritz the Bragg's, add the nutritional yeast and spices, then toss until you have a virgin patch of popcorn and repeat until it's all nicely coated. Munch up!


(Bragg's is the perfect moistener-cum-saltifier as it is gluten-free, nutritious, and sprays on for a light, even distribution. Tamari just isn't the same, it splashes in large doses and renders the kernels it soaks utterly useless soggy messes. A spritzer is the way to go if you're not using butter and want your seasonings to stick.)

7.29.2008

Nori rolls

As a child, I generally avoided dirtying my hands in the kitchen, preferring instead to eat everything that came out of it. I got away with this for years because my mom is such an amazing and willing chef, happy to chop and saute and knead for hours when she has an appreciative audience. It wasn't until my senior year of high school, in anticipation of moving away for college, when I realized that I needed to learn to cook for myself.

One of the few things I would try my hand at and loved making with my mom were nori rolls, the all-veggie sushi roll. I would stand on my toes to see what my mom would pull from her paper bags of groceries, and when the package of nori sheets emerged, I would immediately make myself a snack: toasted nori sheets (passed over the gas flame) dipped in tamari. We would also make incredible nori rolls, with seriously sour and salty umeboshi plum paste (that I could eat by the spoonful), spread on the edges to seal in the sticky rice filling. We would slice the finished rolls on the cutting board and marvel at how perfectly formed the little swirls were, like watching a Fimo bead take shape from a lumpy roll of clay. I would devour each piece, standing over the counter top with a small dish of tamari and my favorite floral chopsticks until I cleaned the final grain of fallen rice from the dish.

Last night, I decided to try my hand at the delicacy and they were a huge success! Alex has only recently tried and enjoyed sushi, so his approval means the world. I made a variety of combinations from our five fillers, but you can use whatever you choose. Our local sushi restaurant makes peanut-avocado rolls, so I attempted a couple of those. I also made mushroom-carrot-avocado, my favorite, and an "everything," as well as simple cuke and avocado rolls. Play with your favorite fillings, get creative. Other options include green beans, soy beans, and bell peppers. When it's all done, as long as your ingredients are good, you can make a mess of the roll and still enjoy every last bite.

Sushi rice
Yields about 4 cups cooked rice
2 cups white sushi rice, rinsed until water is clear (this is necessary to clean off the starches so it will be the right consistency when cooked)
2 1/2 cups water

3 T rice vinegar
1 T sugar
1/2 tsp. toasted sesame oil
1/2 tsp tamari (the wheat-free soy sauce)

1. Cook water and rinsed rice over high heat. Once boiling, reduce to the lowest setting and cover for 20 minutes or until all water is absorbed, stirring several times to prevent sticking to the pot.

2. When rice is done (taste for cooked but chewy texture), remove from heat and let sit, covered, 10 minutes. This helps keep it moist.

3. Turn rice into large bowl and combine with vinegar-sugar mixture. Cut in sauce, as with pastry dough, until rice is thoroughly coated.

4. Spread rice across sides and bottom of bowl to cool. Cover with a damp cloth to keep it wet until you're ready to use it for the sushi.


Momma's Nori Rolls

Makes 8 rolls, with some leftover veggies

4 cups cooked sushi rice, seasoned as above

8 sheets nori, toasted VERY briefly over a low flame (just pass it over quickly until it turns bright green but before it starts smoking)

Filling of your choice:
5 shitaki mushrooms, reconstituted with boiling water for 20 minutes (reserve the liquid)
2 carrots, peeled and sliced into matchsticks, blanched briefly over boiling water
1 cucumber, peeled and sliced into matchsticks
1 avocado, sliced thinly lengthwise
1/2 cup roasted unsalted peanuts

Bowl of water to moisten the edge of the nori.

1. Using the back of a wooden spoon, spread about 1/2 cup of the rice on a sheet of nori (rough side face up). Press the rice onto the sheet, creating a thin coating up to the last inch of nori, being careful not to tear the wrapper. (Keep the damp cloth over the remaining rice to prevent drying.)

2. Line up your chosen filling along the bottom edge of the nori (on the rice end), placing just a few pieces of carrots, cucumber, or mushrooms stacked onto each other. You don't want to add too much or you will burst your nori.

3. Starting at the edge with the filling, wrap the nori over and roll tightly up to the non-rice end. Moisten the dry part with water and complete the roll, resting it seam-side-down on the counter. Slice at 3/4" intervals or so, to your desired thickness, and dunk in sauce (below).

Dipping Sauce
Makes enough for 2 rolls, if you cook it down
This sauce has a pleasantly sweet, woodsy flavor, thanks to the shitaki "juice" which is made from soaking the dried mushrooms in hot water for 30 minutes prior to use.

Simmer, covered, for 10 minutes:
1 cup shitaki soaking water
1 Tbsp tamari
dash of toasted sesame oil

Cook down to 1/3 cup, remove from heat and pour into small dipping bowls. Toss in some sliced scallions and go to town on the sushi.

7.16.2008

Easy tomato sauce

This is our go-to sauce when we want to throw together a pizza, pasta dish, or even a hoagie for supper. I really love the simplicity of the flavors here, and you can modify to suit your taste, but i find that the bit of sugar is necessary to counter the canned flavor (so it isn't usually necessary when working with fresh tomatoes).

1 Tbsp. EVOO
1 Yellow onion, diced
2 cloves garlic, minced
1 28 oz. can Muir Glen organic diced plum tomatoes
1 tsp. sugar
1 tsp. dried oregano
1 handful fresh basil leaves, washed
dash salt and pepper to taste

1. Sautee the onion in the olive oil
2. Add the garlic and tomatoes, bring to a simmer.
3. Add the oregano, sugar, salt and pepper, stir to combine, 5 minutes.
4. Add the basil and more salt and pepper as needed.

You can also add red pepper flakes, bay leaves, fresh rosemary, mushrooms, or peppers to the sautee to bring out other flavors.

7.15.2008

Bountiful breakfast

In continuing my ode to fresh summer berries, I must post this incredible and simple breakfast from last weekend. These Lifestream wildberry buckwheat waffles are my favorite GF variety because they have a really crispy exterior but a velvety inside that melts in your mouth (with tons of berry bits inside). I had them with peach yogurt, my alternative to butter for pancakes and waffles, and piles of fresh summer fruits. It was truly indulgent, the kind of meal that is best on a leisurely morning when you can really savor each bite. In contrast, during the week I often eat these babies plain and slightly frozen as I walk to the subway. I definitely do not recommend that method! So here's to the weekend, even when it seems so far off, for there are little indulgences awaiting.